# Intro
We currently natively support the following languages:
- English
- French
- German
- Italian
- Polish
This means those languages are available as a configuration, and the entire system can run with them.
Beside these languages, we provide support for nearly all languages in the world, for skills only, for as long as you do not set Alice as offline only. We can use Google Translate free services to obtain a good result when sending the request to our NLU.
You can add easily add a new language support for either the entire system or some skills or both
WARNING
Alice is a friend of yours, she's familiar and not impersonal. She uses the familiar "you" and not the formal "you". In French, she uses "tu" and not "vous", in german "du" and not "Sie" etc etc
# What means "Adding a new language support"
We speak of translation, but it's not really a translation, it's basically adding the language support. It's of no use to translate word for word what's in the files. It's really about creating a new language support for the skill. Don't just translate, but add new ways of saying, remove those that are not used in your language, turn utterances around, make it lively. Same goes for the talk files, just use your imagination to make Alice sound natural in your language!
# How to add a new language support
You will need a GitHub account to translate skills or the system. Once you have your account and are logged in, simply Fork the skill you want to translate. Clone your fork on your computer and do the translation.
Commit your changes sporadically and Push them on your repository. When translated, do not forget to increment the version number in the .installfile. Once everything is done, and you successfully ran the basic verifications, you can create a Pull request which we will review and merge if possible and otherwise inform you of what's still needed.
The sections talk files and dialog templates provide further information about the files that need to be translated.
# Adding a new system language support
If you feel like adding a new system language support, we strongly encourage you to first get in touch with us. It's easy to add a new language support, but requires some Alice knowledge to better grasp the context in which the language strings are used. Again, it's not about translating, it's about adding a new language. Make it feel real, lively, familiar! There are quite a few files to translate, let's list them!
# Basic skills
- AliceCore
- ContextSensitive
- DateDayTimeYear
- RedQueen
- Telemetry
Skills can have language files in the following directories:
- talks
- dialogTemplate
- widgets
- devices
Don't forget to:
- Add yourself in the maintainers in the
.installfile - Add your language code as supported in the
.installfile
# System
- ProjectAlice/system/manager/LanguageManager/strings.json
- ProjectAlice/system/manager/TalkManager/talks
- ProjectAlice/system/manager/WebUIManager/*.json
Once these files are made, please contact us so that we can add the language as supported on the core side!
# Translating a skill via the Alice Web Interface
As of version 1.0.0 we introduce the developer mode in the web interface. While you can create skills from scratch with its help, it makes translating existing skills even easier!
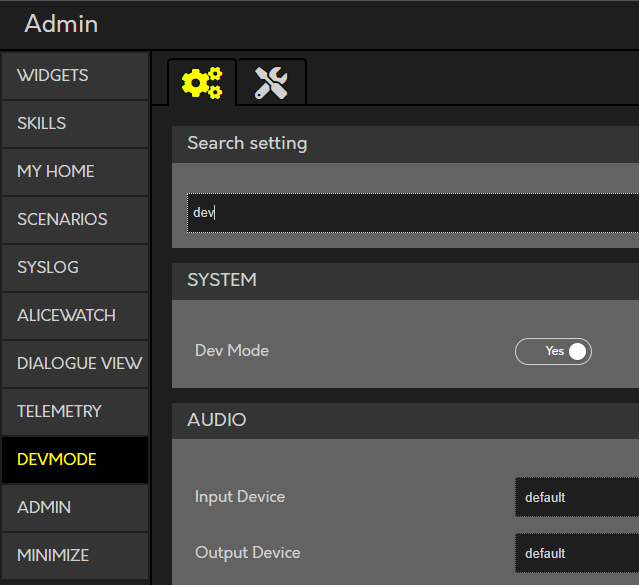
To get started, make sure you have the dev mode enabled in your admin settings. Only then the "devmode" in your menu:
Once you enter the devmode page, you will see all your installed skills. Currently, you can't translate a skill you haven't installed, and you can't install a skill that isn't in your language. (This will change! For now - please change your active language to english as all skills require an english version.)
Select the skill you want to translate by clicking on the coq in the corresponding tile.
This will open up the content of your *.install file for editing directly in the web browser.
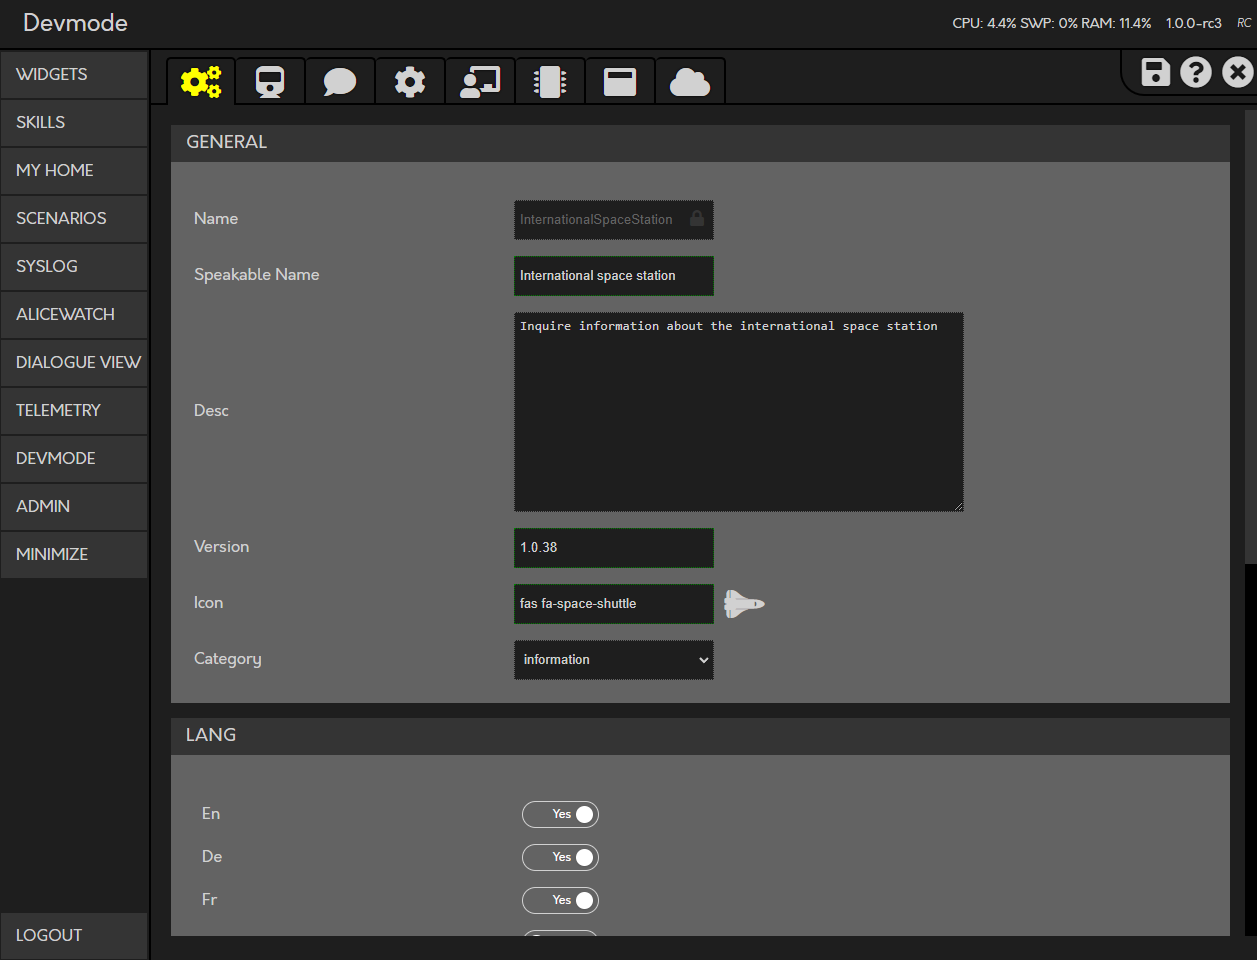 Scroll down, and enable the language you want to translate this skill to. Once you hit save - the floppy disc in the upper right corner - the skill will be available in that language as well, although, it won't have any text yet!
Now you can jump to the first tab where you will start your translation.
Start with the training data, select your target language in the dropdown at the top.
You will see, all intents that need translation are already waiting for you!
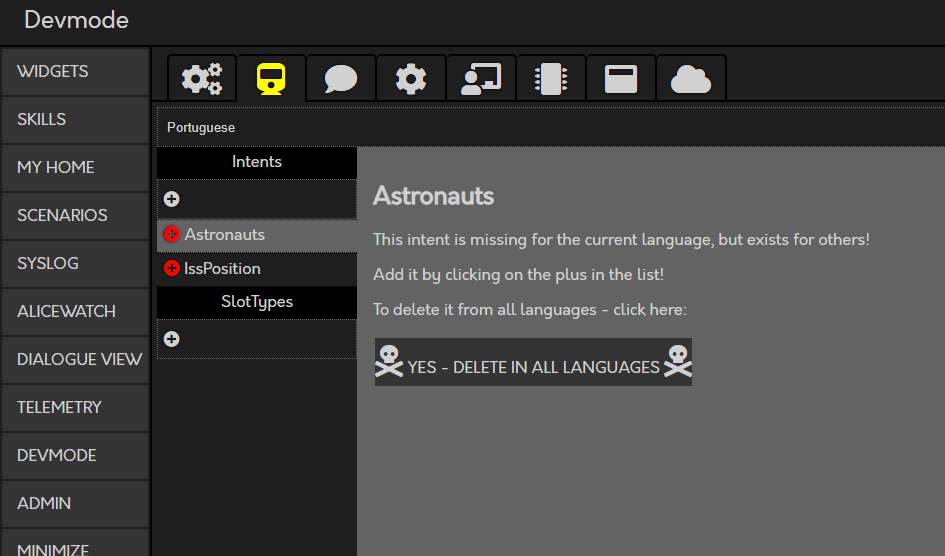 Add them tou your language by clicking on the red plus and start entering the translations on the right-hand side.
While you should NEVER just translate the english wordings, feel free to jump between the different translations to get an idea how the user will interact with the different intents. You don't have to save, while having a quick look at another language. Only when you are done, don't forget to save the save icon in the top right corner!
Add them tou your language by clicking on the red plus and start entering the translations on the right-hand side.
While you should NEVER just translate the english wordings, feel free to jump between the different translations to get an idea how the user will interact with the different intents. You don't have to save, while having a quick look at another language. Only when you are done, don't forget to save the save icon in the top right corner!
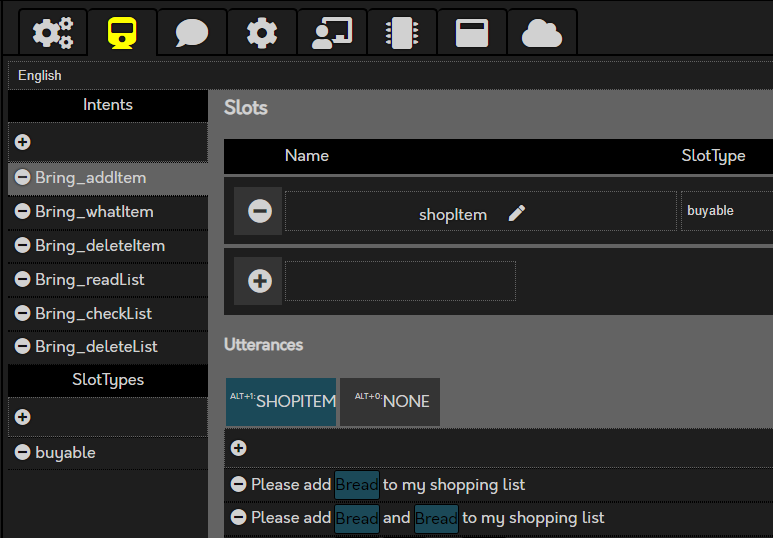
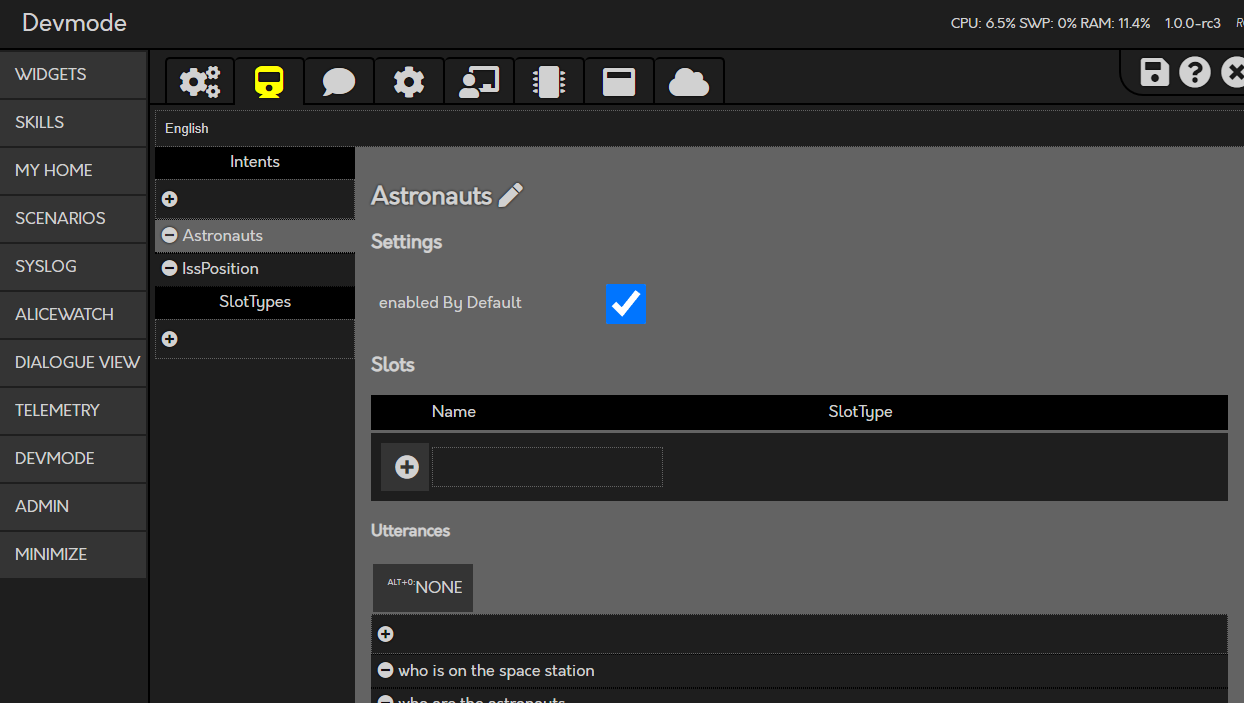 Don't forget to add and translate all the required slot types as well, but take care, some slot types have "technical values" - these don't have to be translated.

Once you have created the slot type and added it to an intent, you can classify the slots in your intents. Either press ALT+1, ALT+2 etc. directly while typing the slot(it will always select the last word you wrote) or mark the word and press the corresponding button above.
When you are done with the intents, don't forget to save and switch over to the next tab. Here you will translate all the things alice will be able to say.
Keep an eye out for placeholders while translating! When the original text contains two brackets {}, your translation has to contain the same number of brackets!
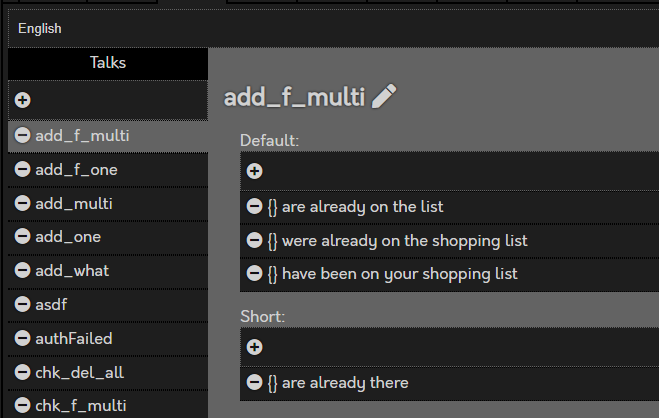 Once you are done all red talk categories should be gone and replaced by white ones.
The next tab can be skipped - currently the custom settings don't have some language specific files! Move on to the tab after it, the instruction files.
Take care, this tab is the only one where you can't jump between the languages without saving first, but don't worry, Alice will remind you before you lose anything!
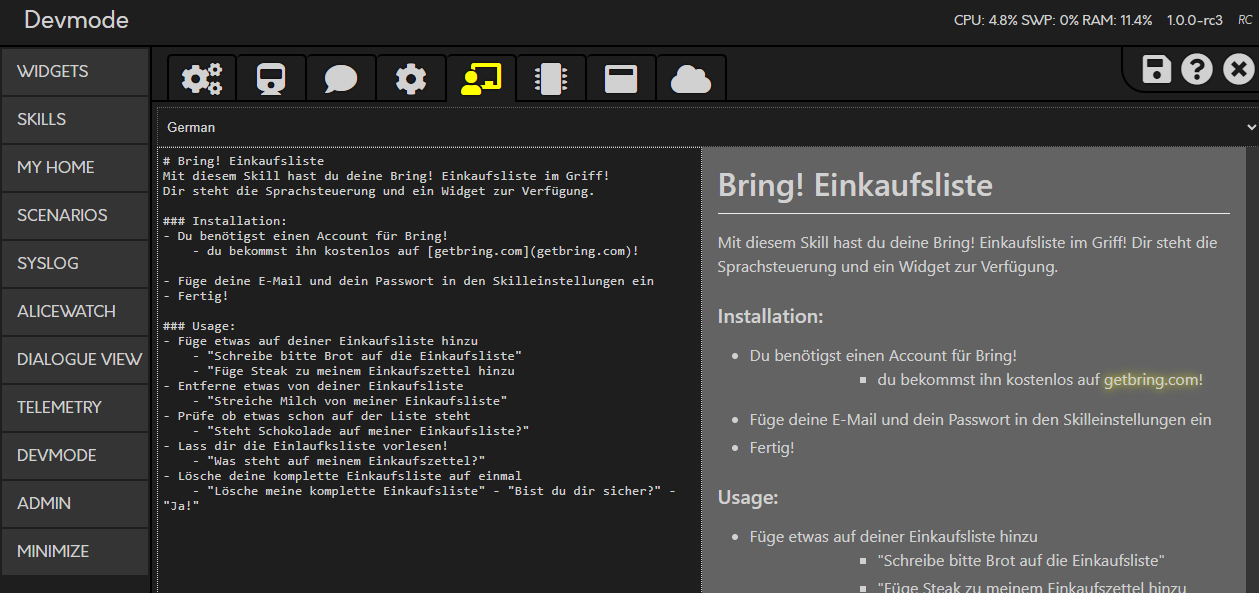 Enter your translation and take care to include all the requirements for that skill. When the user needs to create an account, don't leave out that information!
The next two tabs are work in progress, they will be the home for settings and translations of devices in MyHome and widgets. Skip them for now!
The final step:
Upload your skill to GitHub and create a pull request for us to review and publish for everybody!
When you start, this page should look something like this:
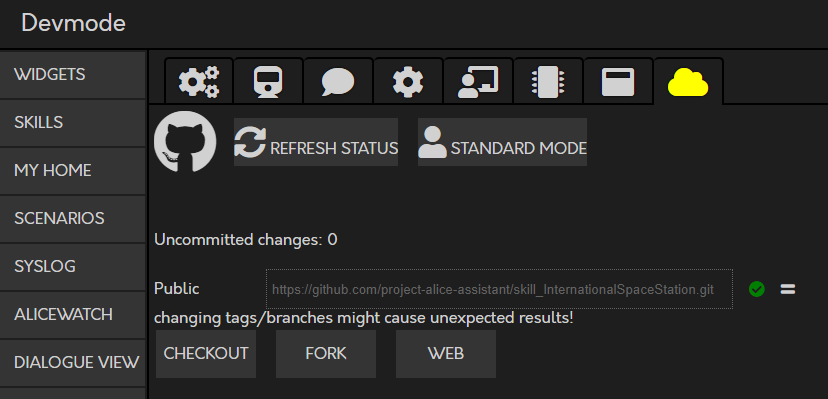 Click on "Fork" to create your own version of that skill on GitHub, a second line will appear containing a link to your own GitHub repository!
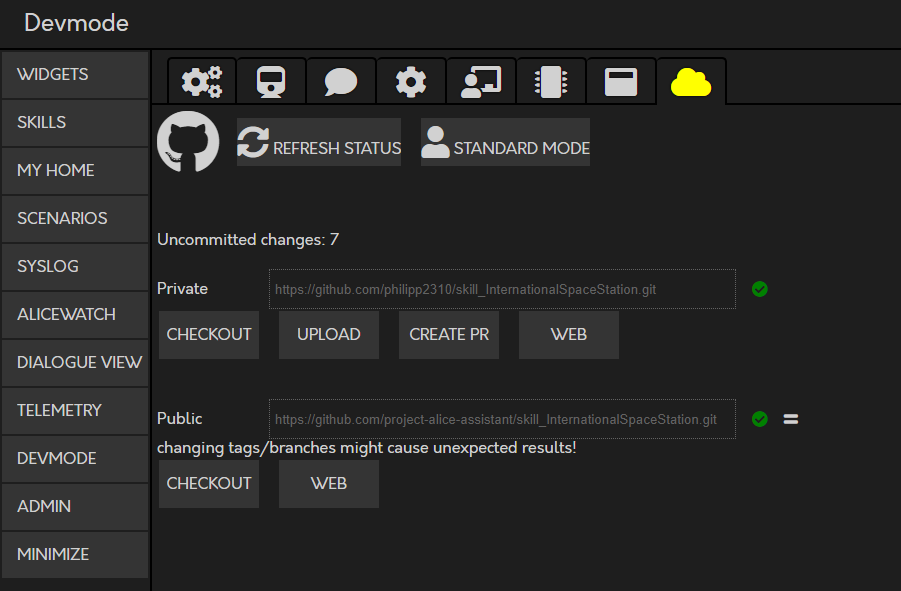
For now only the "Upload" button is relevant for you, as all your work is just locally available! Press it and wait for the upload to finish.
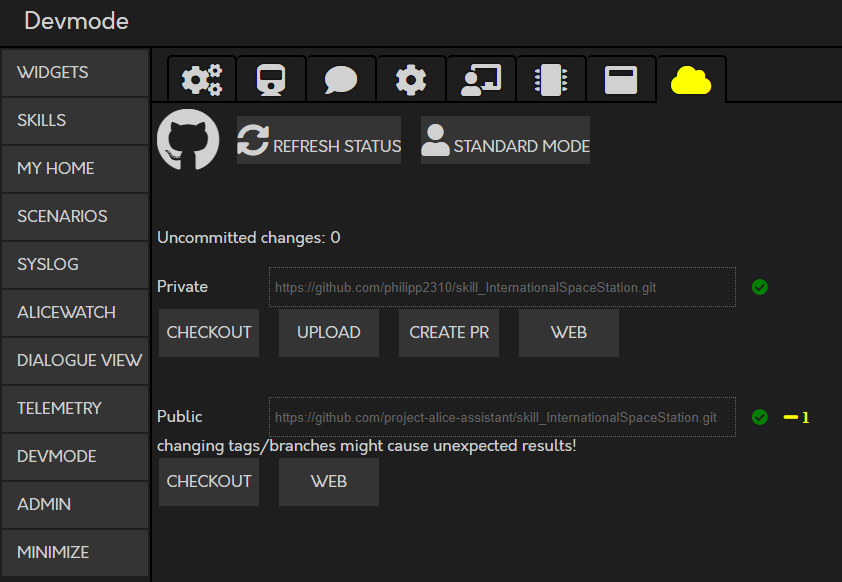 As you can see, the "Uncommitted changes" changed to 0 - all changes are pushed to GitHub!
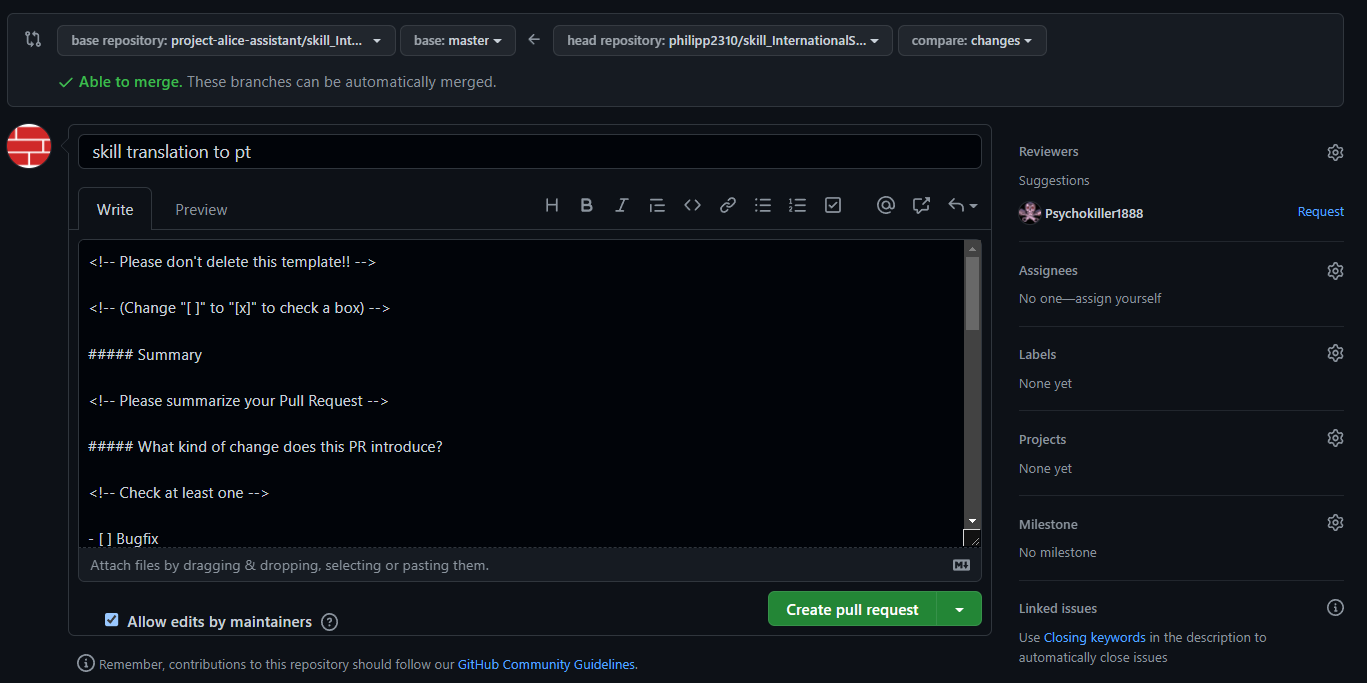
The final step: Create PR
Enter a meaning full short description e.g. "skill translation for pt"
A new window will open where you can add more information on GitHub - finalize your work by clicking on "Create pull request"!