
# Pycharm from Jetbrains
Have you just started with Alice and all excited with the possibilities you could unlock by creating your own skills? But uncertain where to start? Well you've come to the right place. Alice is written in the Python language. The team behind Alice do most of their Python magic and more using an IDE called Pycharm. For that reason and because it's a great program we will focus on getting Pycharm setup for you. That way getting help in the discord will also be easier. So let's get started.
What we will cover in the below!!
- Where to get Pycharm
- Basics of GitHub
- Setting up Pycharm directories
- Check dependencies are set
- Changing branches
- Quality control settings
- Updating your repositories
- Some handy Alice commands when skill making
Yes I understand there are a quite a few steps in this process but for the most of it you'll only have to do it once. Then you'll have the re assurance that you've done all you can to meet the Alice code guidelines. Which by the way is something you should read as well...
# Download and install Pycharm
First lets download Pycharm, The community version is free and a great starting point. Get that from here: https://www.jetbrains.com/Pycharm/download
# A bit about GitHub.
Great, so now Pycharm is downloaded and installed lets set up a few things to make it easier in the long run. If you haven't already get yourself a GitHub account. You can read about it here https://git-scm.com/book/en/v2/GitHub-Account-Setup-and-Configuration or jump straight to the signup page here: https://GitHub.com/.
The below steps aren't vital to code in Pycharm, but it certainly worth doing to have the version control ability and in the future push and pull to your repository.
GitHub if you don't know, is on a basic level a storage spot for developers with a tonne of features but mainly "version control" is what you're going to want from it for now. GitHub once setup allows you to push and pull files between repositories without missing latest updates and writing conflicting code with other developers. That way code sharing and file changes are controlled across repositories (repo's for short).
So when you create a new skill via the Alice dev-mode interface and upload it to GitHub, it will initially create the required framework for the skill. It will then place the new skill in your ProjectAlice/skills/ directory on your PI and store it on GitHub as a repository.
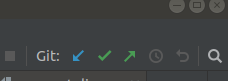
Now when you edit/modify the skill and ctrl + s to save it, it will save the changes ONLY to your PI and the GitHub copy will stay the same. When you feel you have the code at a point that you want to save it on GitHub as well, then in Pycharm you can click the green downwards pointing arrow (top right of the Pycharm screen) and "commit" the changes.
Committing the changes in simple terms, is geek talk for saving. 😃
It tells GitHub you've modified code, and you want to store it on GitHub. Once committed, you then click the blue "update project" arrow (or ctrl + shift + k also called push which does similar). Pycharm will then "push" your commit (modified files) to your GitHub repo. By pushing to origin, you will now have a backup of your files on GitHub which at a later stage you can share with who ever or create a "pull request" (PR) to the ProjectAlice team, so the skill can be reviewed for merging/adding in the Alice store so everyone can enjoy using it.
# Setup Pycharm directories
# Option 1
This option is a safe way to start out with Pycharm it also gets you familiar with GitHub version control.
Warning Unless you use Pycharm professional, going with this option will mean you either have to copy your skill folder to Alice each time you want to test something. Alternatively push the updates to your repository, and then on your Pi.
cd ProjectAlice/skills/<your skill name>
git pull
sudo systemctl restart ProjectAlice
- Sign in to GitHub. Go to ProjectAlice.
- In the top right of that page, click on "fork" to basically clone a copy of ProjectAlice to your own GitHub account.
- Now create a folder on your Desktop somewhere. Let's say for now it's going to be Documents/GitHubProjectAlice for example.
- Now open Pycharm
- In the menu along the top of Pycharm click on "VCS" then "get from version control"
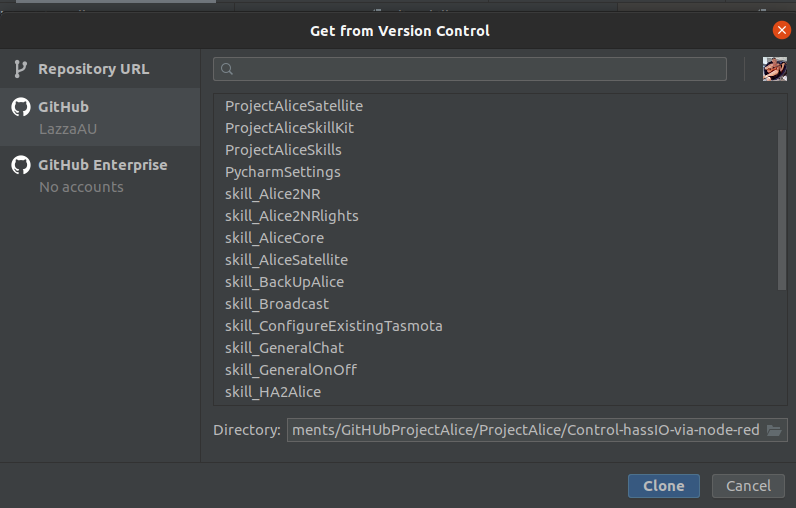
- In the window that opens click on "GitHub" from the menu on the left. You should see in the list that appears your ProjectAlice fork you just forked.
- Click that and direct it to the "Documents/GitHubProjectAlice" folder you just created.
- Make the path -> Documents/GitHubProjectAlice/ProjectAlice so that it clones into a folder called ProjectAlice.
- When Pycharm pops up a window choose "this window".
Then once done click VCS again and then "get from version control" then "GitHub " again and select your skill. Make the path now go to Documents/GitHubProjectAlice/skills/ .... when asked by Pycharm choose "attach".
Now you should have Pycharm displaying ProjectAlice and all her files and your skill showing up in the ProjectAlice/skills directory. (note this is all local files and nothing to do with your Pi for now)
# Option 2
Auto login to your pi and set up a sshfs connection to trick Pycharm
This below optional method will allow you to load your PI's ProjectAlice files directly into Pycharm. Therefore, allowing you to modify the files on your PI directly. However, this raises the chances of you breaking Alice so only recommended once you feel a little more comfortable with how things work.
Follow these steps https://www.tecmint.com/ssh-passwordless-login-using-ssh-keygen-in-5-easy-steps/ to set up auto login to your pi ( no need to keep typing password)
Create a folder on your desktop computer in the home directory called something like "Development"
Then type this command on your desktop terminal >>
sshfs -o reconnect -o nonempty pi@192.168.1.4:/home/pi/ProjectAlice /home/bob/Development/Alice
(obviously change the IP to your pi's IP and the second path to your new development folders path)
What this will do is gain access to your PI via your windows/linux desktop by creating a folder in the Development folder and show the contents of your PI's's ProjectAlice folder. In doing so Pycharm will think the Development/Alice folder is an actual folder on your desktop and therefore in Pycharm you can now view and modify ProjectAlice files via Pycharm directly 😃
# Pycharm dependencies
Now you have the directories loaded in Pycharm. Go to Pycharm settings ( ctrl + shift + s )
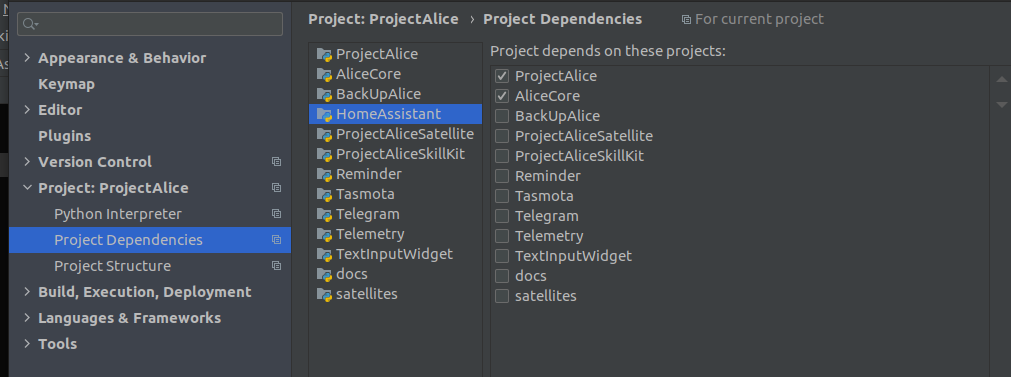
- Then in the menu on the left. Click "project-alice-assistant/ProjectAlice".
- Then click "project dependencies"
- Now click your skill to highlight it
- Then put a tick in "ProjectAlice" tick box to tell Pycharm your skill depends on the files from the ProjectAlice files
# Changing branches
The latest branch in Alice as of writing this is b3. You may want to set your Pycharm to B3 branch, so you stay up to date with the latest changes.
In Pycharm click your way through this
VCS -> Git -> branches-> repositories ->ProjectAlice -> local branches -> 1.0.0-b3 -> checkout.
That should cause Pycharm to move to the b3 branch. You'll only need to do this once also unless you start playing with branches, but I don't advise that for now until your use to that side of things.
That should be enough for the moment to get Pycharm setup as far as main directories go. Next we need to set up SonarCloud, sk-package, and Pycharm settings so that your code is as compatible as possible with Alice.
# Quality control settings
First let's now set up the ProjectAlice-Sk package
- Fork the sk repo from SkillKit
- In Pycharm click into "VCS" menu then "GitHub" (just like earlier)
- Select your sk fork and download it to GitHubProjectAlice/ProjectAlice/SkPackage ( or similar)
- Choose "attach" when prompted.
- Now go to "run " menu in Pycharm (along top of screen)
- Then choose "debug configuration"
- click the + sign to make a new script.
- Call it something like "Alice Validation "
- Then to the right of that screen ... for the field "script path " enter the local path to the ProjectAliceSkillKit.py file
- In the field "parameters" add
validate --paths /home/bob/Documents/GitHubProjectAlice/ProjectAlice/skills
(Change the path to suit your path to the skills directory.)
- Put a tick in the box , "run with python console"
- Click apply.
Now when in Pycharm and you click the run icon (top right of screen) with the Alice Validation script selected, Pycharm will loop through every skill you have listed in the skills folder and do a validation on it. It will print the results out in the console of Pycharm.
As an added bonus let's also add the sk schema files to Pycharm so that you get instant feedback on quality of your .install file and json files etc. Note that this does NOT check everything that the Sk package does, so you still need to do the above. This will just tell you if you've got a syntax wrong as you modify the file.
Go to this page Schema Files
Take a look at that list. You will see different schema files for different file types. We will now go through installing just one of those types into Pycharm, and you can do all the rest on your own.
Let's pick on the install-schema.json file. click it to open that code then click the "Raw" button to the right.
Copy the URL
Come back to Pycharm and go to your skill.
Double-click the installation file for your skill to open it in the editor
Now at the very bottom right of your Pycharm do you see a "no schema" button ? click that to open the schema configuration screen.

Note this image shows JSON ProjectAlice talks.... you'll likely have JSON No schema
- Then click "new schema mapping"
- For name field type in something like "Alice install"
- For URL field paste the URL of the Raw file you just copied
- On the right-hand side of that screen click the + to add new mapping
- Type *.install
that should now apply that schema to any of the
blah.installfiles in the future. - Click Apply
- Do the same with the other schema's but obviously change the mappings to something that will capture that file type like *talks/en.json should capture all talk json files of en language
Secondly set up SonarCloud
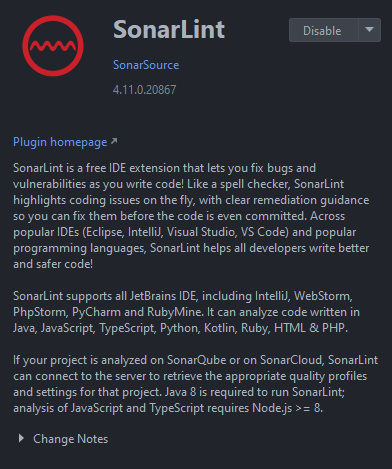
SonarLint (SonarCloud, sonarQube) is a great tool for making sure your code complies with Alice. It will warn you in Pycharm when you call a variable Thisis_myVariable instead of the Alice way which is thisIsMyVariable and of course many other checks. It's a must-have plugin so let's go add that now.
Pycharm has a Sonarcloud plugin that can check your code to make sure it is following our guidelines!
- Create an account on SonarCloud
- Contact us to add you as a skill dev, in order for you to generate your access token
- Once you've been added in our skill dev group, go to your SonarCloud profile, under security, and generate a new access token.
- In Pycharm open your settings
- Go to
Plugins - Search and install
SonarLint
- Under
ToolsselectSonarLintand click on the+to add a new connection
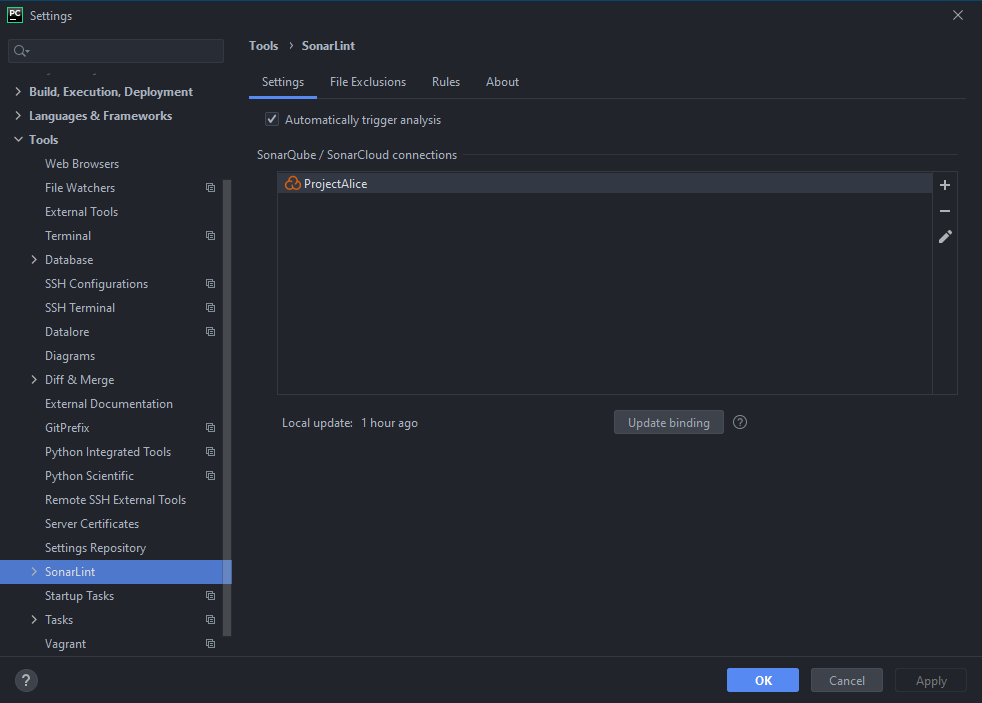
- Name it
ProjectAliceand chooseSonarCloud, then click on next
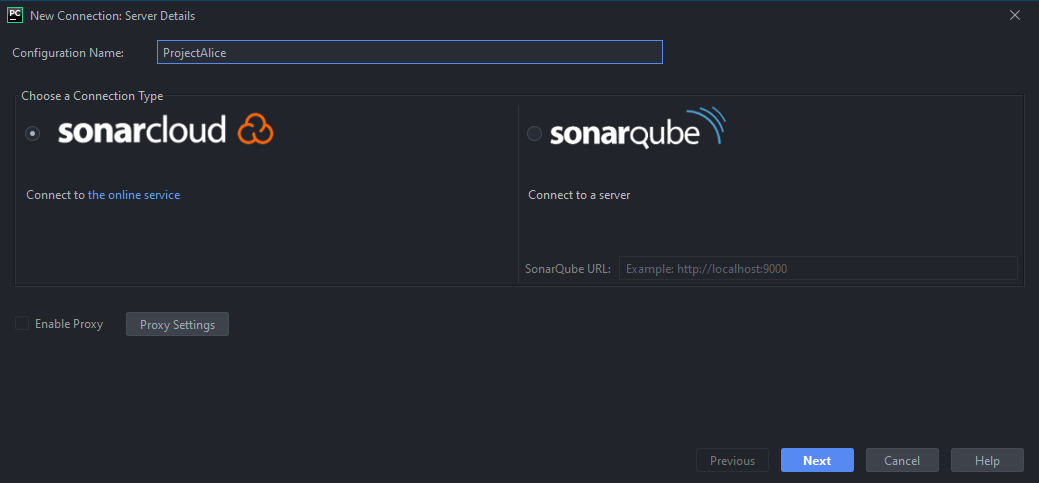
- Enter your SonarCloud token, and you're good to go!
# Updating your repository
Let's touch a little more on GitHub repos and keeping them up to date
Alice is always evolving. As such the files in Alice are always changing. So that you have the latest files we want to get into the habit of pushing and pulling the Upstream repo.
"Wooah back up buddy" I hear you saying.... that's a new word. what's upstream ?
Well your repository as far as GitHub is concerned is called "origin". Whereas the repository you forked from is called "upstream" so in this case the upstream for your ProjectAlice files will be. https://GitHub.com/project-alice-assistant/ProjectAlice
Knowing that, let's add that url to your Pycharm, so we can receive updates.
- Click "VCS" then "Git" then "remotes"
- You should see in the list ProjectAlice "origin"
- Click your remote repo in this screen to highlight it
- Now click the + sign
- In the window that opens. For the "name" field, add "upstream" <<- has to be that nothing else will work.
- In the url field add " https://GitHub.com/project-alice-assistant/ProjectAlice "
- Click save
- Now click "VCS" again and then "git" then "fetch" this will update head and branches etc
- Next click "VCS" again then "pull"
- In the window that opens starting from the left drop down box ....

- Choose ProjectAlice
- Choose "pull"
- Choose "upstream"
- Choose "b3 branch"
- Click pull
it will now "pull" all the latest changes that the Alice team have pushed recently into your local files on your computer. Pycharm is now up-to-date. However, your "origin" (your repo) isn't up-to-date with your Pycharms local files now. So now do a ctl+shift+k to "push" updated files to your origin repo. This process of pull and push will become second nature to you eventually. 😃
# Handy Alice commands when testing a skill
When making a skill you'll often not get it right the first time and frequently use print statements. These don't show in syslog. So to be able to view these statements along with being able to see clearly what's happening when you run Alice you may want to start her manually.
To do that:
sudo systemctl stop ProjectAlice
cd ProjectAlice
./venv/bin/python main.py
You'll then get to see in the terminal any print statements you put in your code.... along with easy to read console messages and comes with colour
Hope that has helped. Enjoy your coding adventures.
By LazzaAU